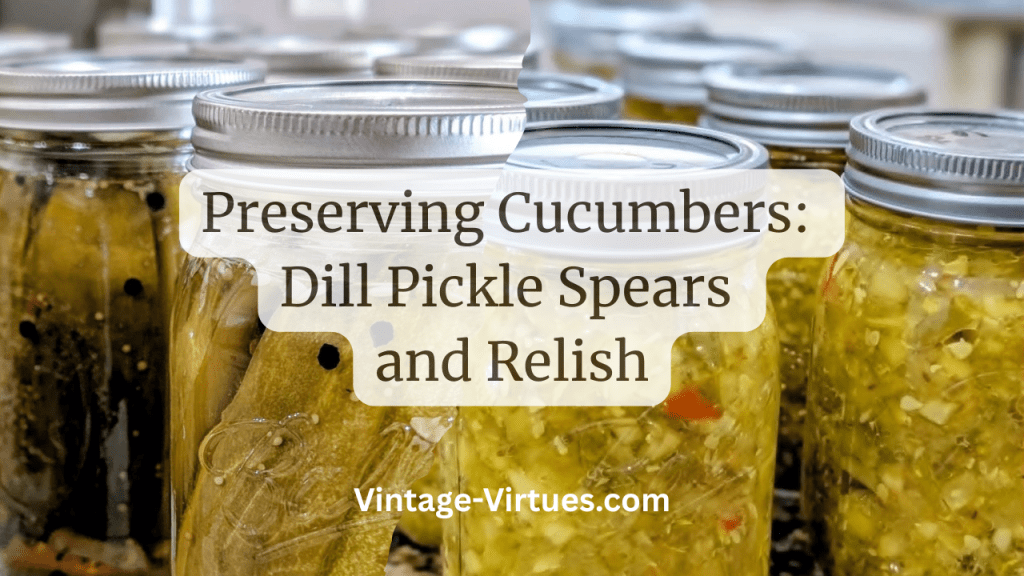
Friends of mine gifted me with over 20 pounds of fresh cucumbers from their super-productive garden harvest this summer. I knew exactly what I needed to do. It was time to get out my water bath canner and preserve this abundance of cucumbers before they went bad. There’s nothing quite like the satisfaction of lining up pint jars filled with homemade pickles and homemade dill relish on your pantry shelves, knowing you’ll enjoy them for months to come.
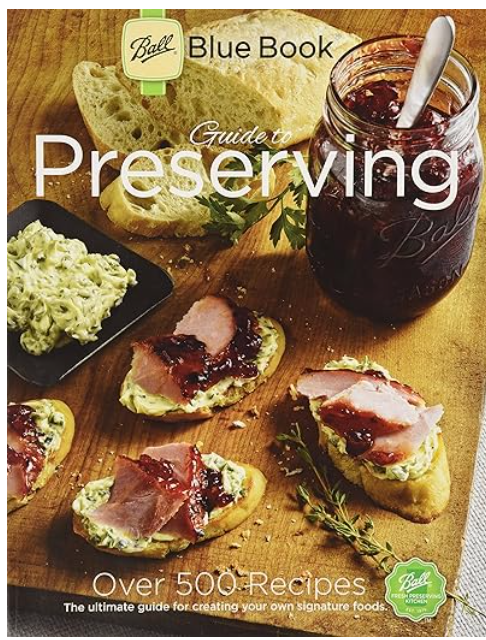
I’ll be honest with you. My first time canning pickles was an epic fail. I’d grabbed a recipe off the back of a bag of canning salt, and the finished product was so salty it was completely inedible. They couldn’t even be salvaged. That’s when I learned an important lesson: stick with tested canning recipes from reliable sources. My husband’s grandmother swears by the Ball Blue Book Guide to Preserving, and after years of using it myself, I understand why. These recipes have been tested and perfected, so you can make them with confidence.
Understanding Water Bath Canning
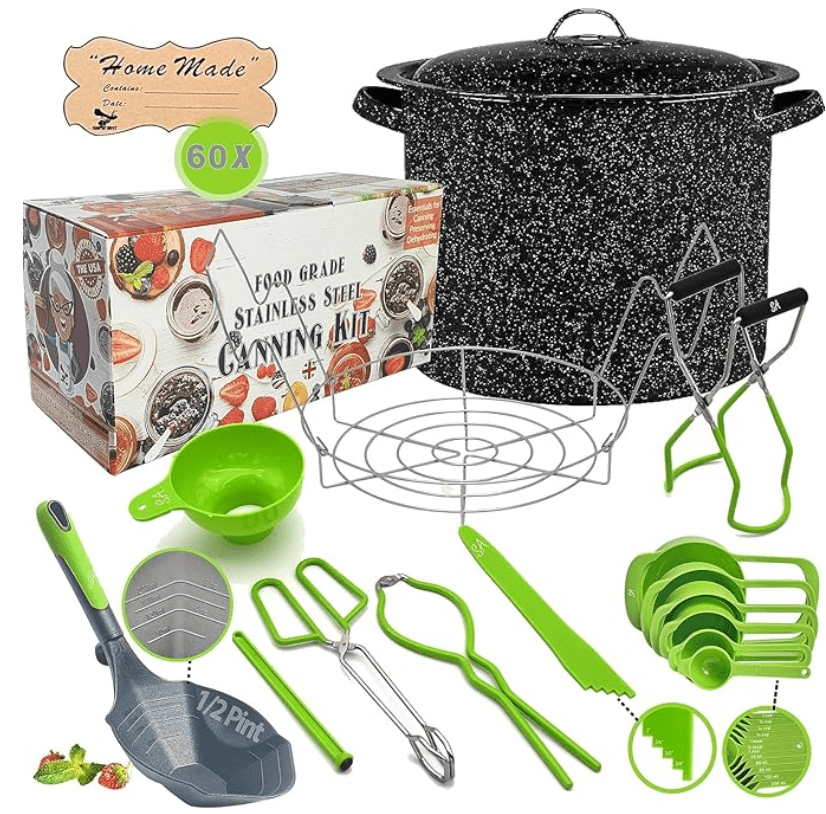
Water bath canning is a great way to preserve high-acid foods. You’ll need some basic equipment: a large stock pot or water bath canner, a jar lifter, pint-sized jars or larger jars depending on your preference, new lids, and bands. The process involves filling jars with your prepared food, sealing them, and processing them in boiling water for a specific processing time. This method is perfect for pickling cucumbers, making sweet pickle relish, and preserving fruits.
Unlike low-acid foods that require pressure canning, pickles are safe to can in a water bath. The vinegar in these recipes provides the acidity needed for safe preservation. Some people use their local extension office or look for a master food preserver in their area for guidance. The Cooperative Extension System and University of Georgia Extension publications offer excellent resources for first-time canning.
Recipe 1: Kosher-Style Dill Pickle Spears
This recipe yields about 7 pints or 3 quart-sized jars. I doubled the recipe and used quart-sized jars, which you’ll see in the embedded video.
Ingredients:
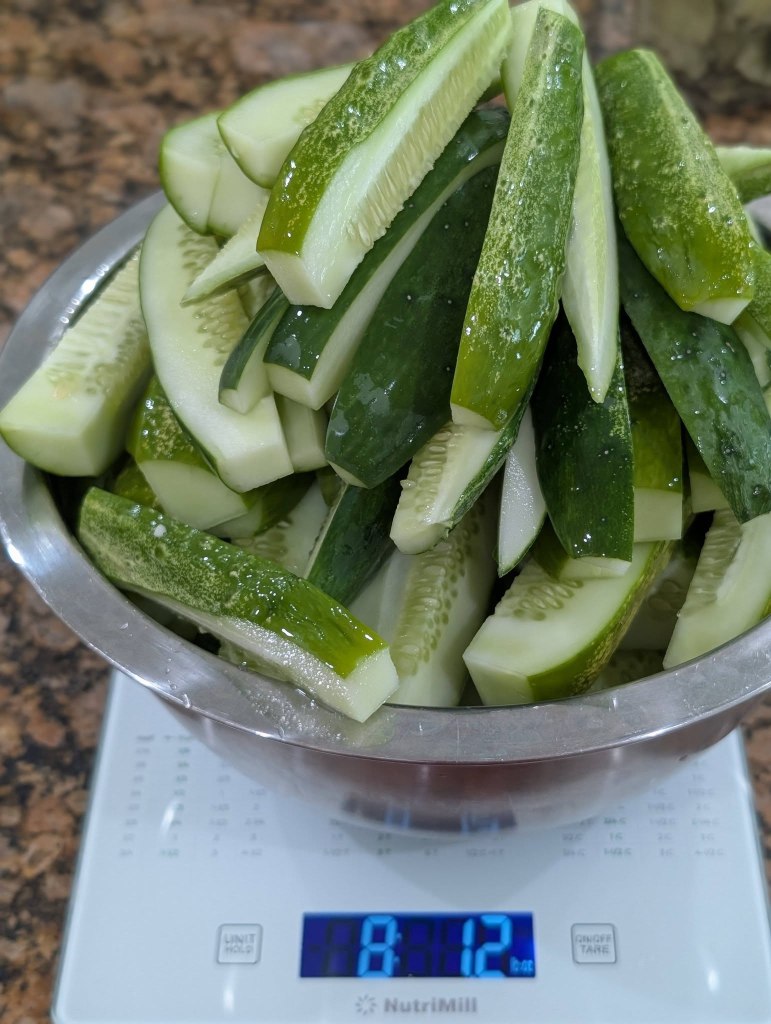
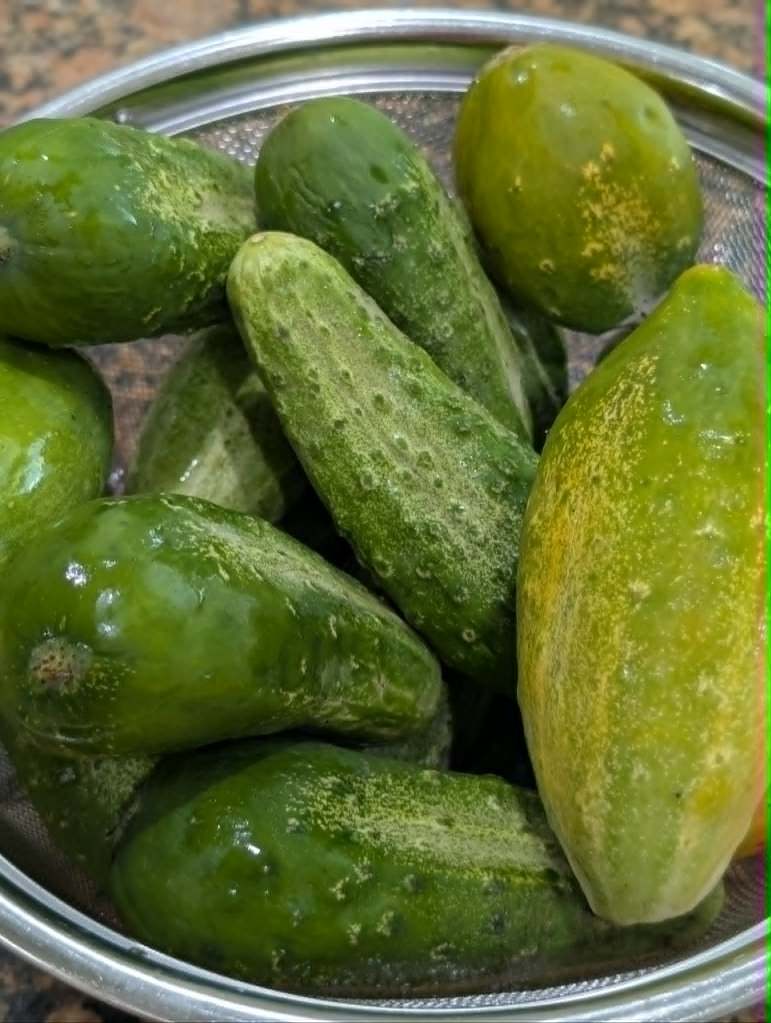
8 pounds of 4-6 inch pickling cucumbers
3/4 cup sugar
1/2 cup canning salt
1 quart (4 cups) of 5% acidity vinegar
1 quart (4 cups) water
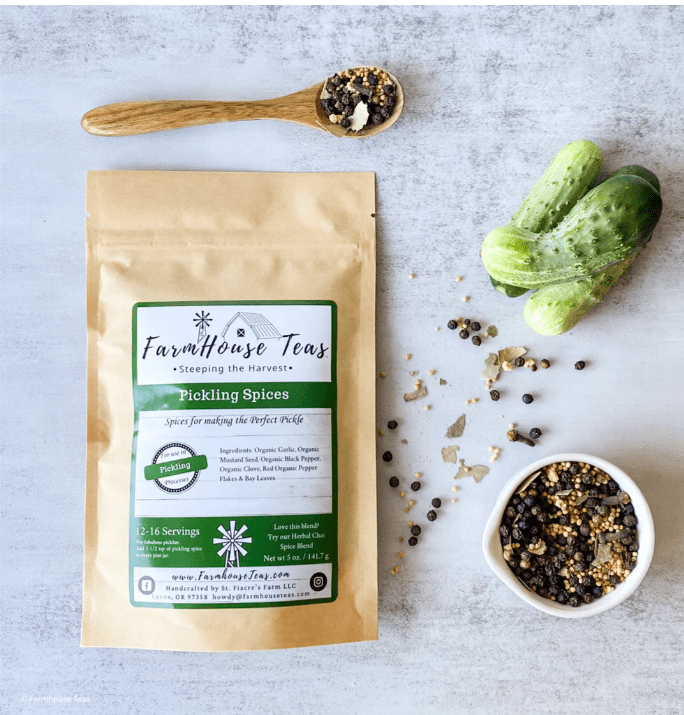
3 tablespoons of pickling spice (I used FarmHouse Teas)
7 heads of fresh dill
7 bay leaves
7 cloves of garlic
All of the ingredients will be divided evenly among the jars, whether you use pints or quarts.
Preparation:
Wash cucumbers thoroughly under cold water and slice off the blossom end and stem ends. The blossom end contains enzymes that can soften pickles, so removing it is important. Cut cucumbers into spears or slices if preferred. Rinse dill under cool water and peel garlic cloves. Set everything aside on a cutting board while you prepare your canning liquid.
Cooking Process:
Combine sugar, canning salt, vinegar, pickling spice, and water in a saucepan. Bring to a boil over high heat, then reduce to medium heat and simmer for 15 minutes. This creates the perfect balance of flavors for your dill pickles.
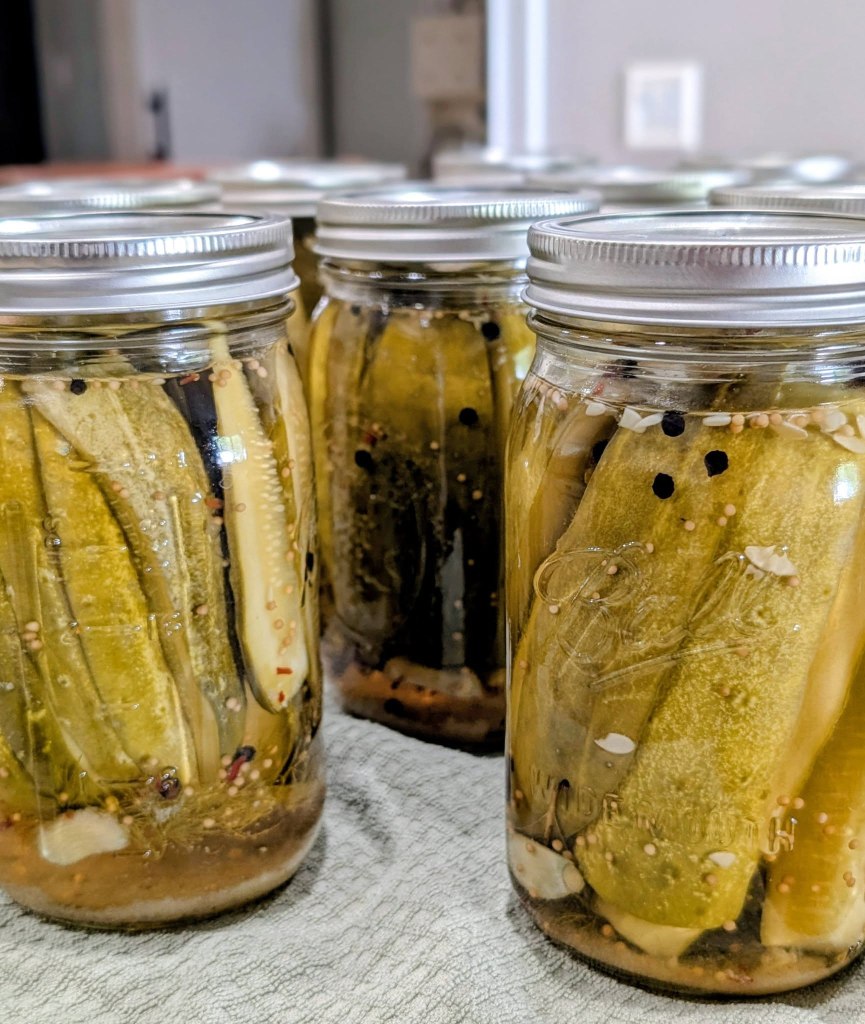
Meanwhile, in your water bath canner, bring water to a boil and sanitize your canning jars. Remove hot jars with a jar lifter and carefully place them onto a kitchen towel. Fill hot jars, leaving 1/2 inch headspace, with one head of dill, one bay leaf, one garlic clove, and cucumber spears. Ladle hot pickling liquid over the cucumbers, maintaining a 1/2-inch headspace. Use a plastic utensil to remove air bubbles by sliding it down the inside of the jar. Clean each jar rim with a damp cloth. Center the lid on the jar rim and tighten the jar band to fingertip-tight (don’t over-tighten).
Place filled jars into simmering water at 180 degrees. Make sure the jars are covered with 1 inch of water over the top. Adjust the heat to medium-high, cover the canner with the lid, and bring to a rolling boil. Process for 15 minutes. Turn off the heat, remove the cover, and let the jars sit for 5 minutes before removing them. Cool for 12 hours at room temperature. Check to make sure jars have sealed before storing in a cool, dark place.
Recipe 2: Homemade Dill Relish
This dill pickle relish recipe is the yummy kind you top hot dogs with, stir into potato salad and tuna salad, and keep on hand all summer long. Unlike the sweet relish or sweet pickle relish you find in grocery stores, this version has plenty of flavor without being overly sweet. It’s an easy recipe that yields about 7 pint jars.
Ingredients:
8 pounds of pickling cucumbers
1/2 cup canning salt
2 teaspoons turmeric
4 fresh red chili peppers
3 medium yellow onions
1/3 cup sugar
2 tablespoons dill seed
1 quart (4 cups) water
1 quart (4 cups) white wine vinegar
Preparation:
Wash cucumbers and slice off tops and ends. Finely chop cucumbers into small pieces, or use a food processor to save time. A food processor makes quick work of chopping, though you can certainly do this by hand on a cutting board if you prefer a small batch approach.
Put chopped cucumbers into a large bowl and sprinkle with 1/2 cup of canning salt and 2 teaspoons turmeric powder. Mix to coat evenly. Pour water over the mixture until cucumbers are covered. Cover with a tea towel and let sit for 2 hours at room temperature. This process draws out a lot of moisture from the cucumbers, which is essential for a properly textured relish.
After 2 hours, drain the cucumbers using a fine-mesh strainer, then rinse them thoroughly with cold water to remove excess salt. Let the drained cucumbers sit in the strainer while you prepare the other ingredients. In your food processor, dice the onions and red chili peppers. If you prefer less heat, you can substitute green bell peppers for some or all of the red chili peppers, or add red pepper flakes to taste instead.
Cooking Process:
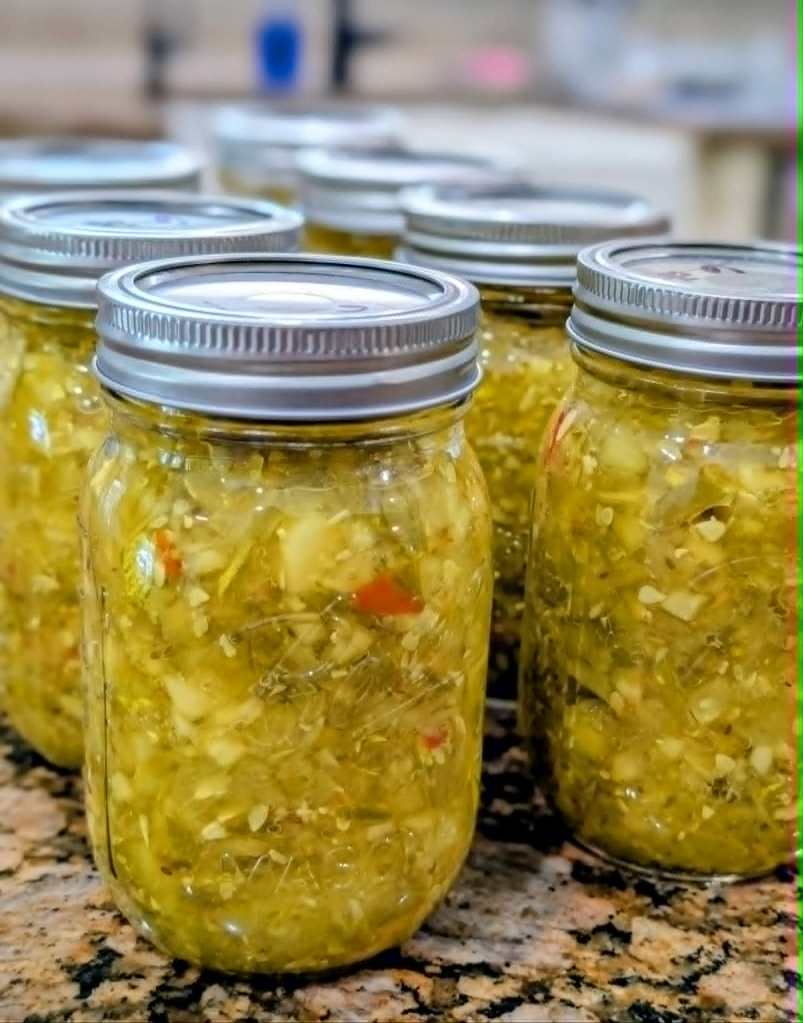
In a large stock pot, combine the drained cucumbers, onions, and peppers with sugar, white wine vinegar, and dill seed. Some people also add celery or mustard seeds for additional flavor, though the original recipe doesn’t call for them. Bring the mixture to a boil over high heat, then reduce the heat to medium and simmer for 10 minutes.
While the hot relish simmers, prepare your water bath canner by bringing water to a boil. Sanitize your pint jars in the boiling water bath. Remove hot jars with your jar lifter and place them carefully onto a kitchen towel. Fill hot jars with the relish mixture, leaving 1/2 inch headspace. Remove air bubbles with a plastic utensil. Clean each jar rim thoroughly. Center the lid on the jar rim and tighten the jar band to fingertip-tight.
Place jars into simmering water at 180 degrees, ensuring they’re covered with at least 1 inch of water. Adjust heat to medium-high, cover the canner, and bring to a rolling boil. Process for 15 minutes. Turn off the heat, remove the cover, and let jars sit for 5 minutes. Remove and cool for 12 hours. Check seals before storing in a cool, dark place.
Tips for Success
Regular cucumbers from grocery stores often work, but pickling cucumbers are ideal because they have less moisture and stay crispier. Larger cucumbers can be used but may need to be seeded to remove excess moisture. Always use canning salt rather than table salt, which contains anti-caking additives that can cloud your brine. Some recipes allow for sugar substitutes like granular Splenda, but I recommend sticking with the required sugar in tested recipes.
Store your canned product at room temperature in a dark place. Once opened, refrigerate and use within a few weeks. These homemade dill pickle relish and pickle spears are perfect for summer gatherings, adding to sandwiches, or giving as gifts.
More Pickling Adventures
If you really love pickling, you’ll want to try Dilly Beans. Green beans are one of my favorites to pickle, and they’re just as easy as these cucumber recipes. The full recipe is here: How to Can Dilly Beans | Pickled Green Beans Recipe.
Whether you’re dealing with an abundance of cucumbers from your garden or picked up a great deal at the farmer’s market, these recipes are a quicker method than many complicated canning recipes. The National Center’s fact sheets and extension publications provide additional guidance if you have questions. Don’t hesitate to call your local extension office if you need support. Many areas have volunteer programs where experienced canners help beginners.
Water bath canning opens up a world of preservation possibilities beyond just pickles. You can make pectin-added jams, pectin gel products, and preserve all sorts of fruits and vegetables. Just remember: how do I know if my recipe is safe? Always use tested recipes from reliable sources such as the Ball Blue Book, university extension services, or the USDA.
With these two recipes in your preserving repertoire, you’ll be ready to handle any cucumber harvest that comes your way. The satisfaction of opening a jar of your own homemade pickles in the middle of winter, remembering the summer garden and the friend who shared their harvest, makes every minute of canning worthwhile. Small jars make great gifts, while large jars keep your family supplied with delicious pickles and relish throughout the year. Don’t forget to watch the 1-minute video below on canning dill pickle spears. Happy Canning!
Affiliate Disclosure:
This post contains affiliate links. That means I may earn a small commission, at no extra cost to you, if you make a purchase through one of these links. You can read the full disclosure here. Your support helps cover the cost of running Vintage Virtues and means so much.

Leave a comment