This recipe has moved!
You can now find an updated (with dairy) and fully formatted version of this recipe on my new site, Gluten-Free Heritage — where I’m sharing all my favorite recipes made with fresh-milled, gluten-free grains.
Click here to view the full recipe: Soft Millet & Sorghum Yeast Bread Rolls (Gluten-Free)
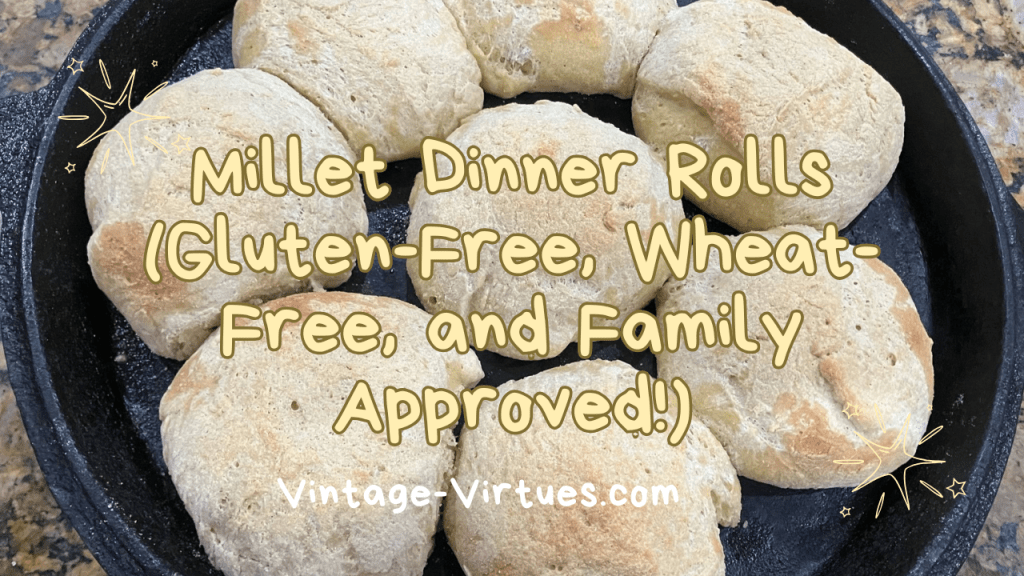
There’s nothing quite like a warm, homemade dinner roll to complete a meal—and if you’ve been navigating the gluten-free or wheat-free life for a while, you know the struggle of finding one that doesn’t taste like a hockey puck or crumble like sand. After lots of trial and error (RIP chickpea roll experiment), we’re finally getting somewhere.
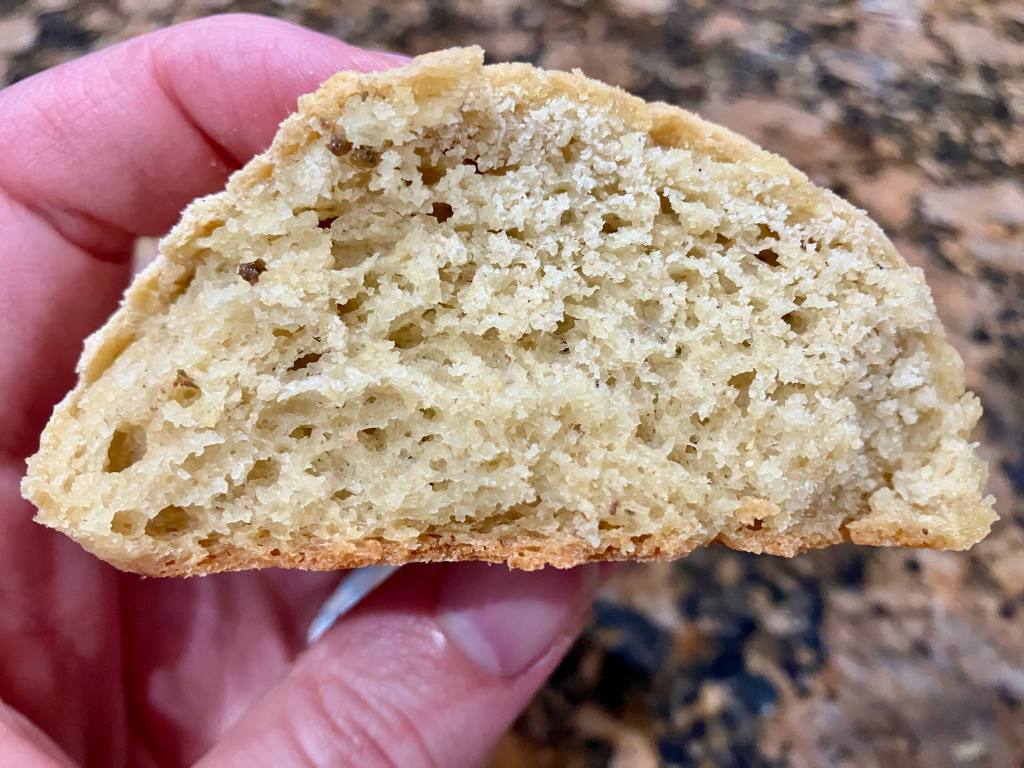
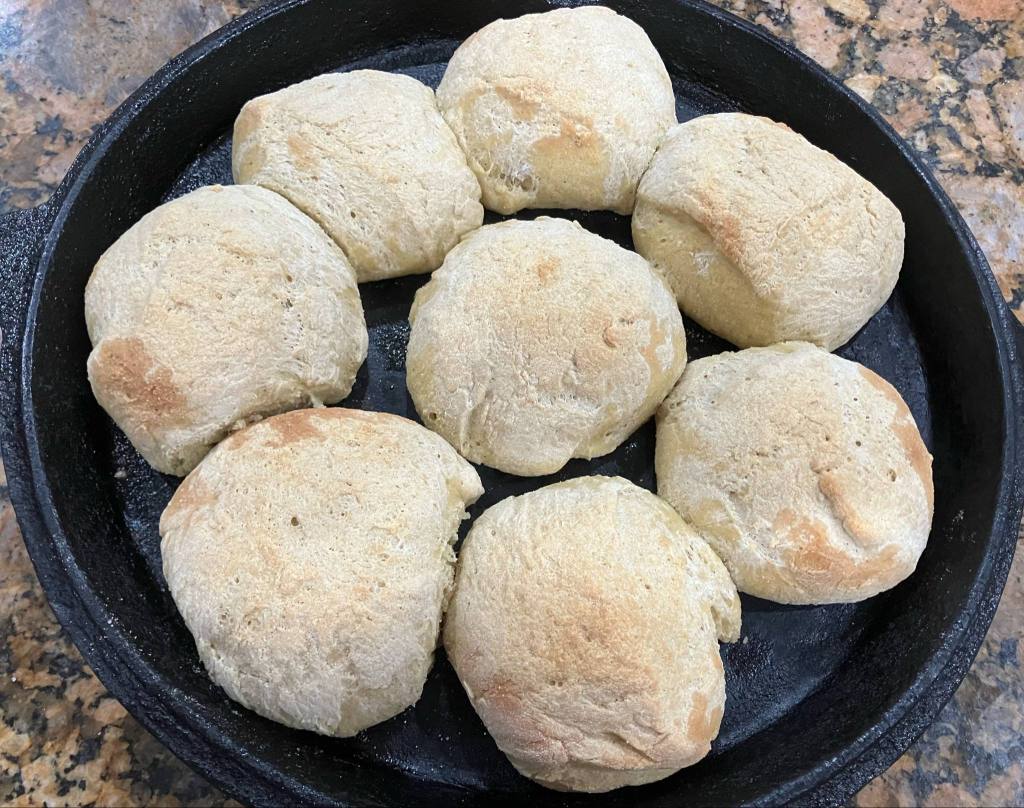
These millet-based gluten-free dinner rolls are fresh, hearty, and soft, with a slightly grainy texture—think whole grain bun, not white bread. And the best part? They actually rise. That’s a big win in the gluten-free world.
Even better, both my gluten-loving husband and my gluten- and wheat-free son gave them a thumbs up. In our house, that’s no small feat.

How We Served Them
I made these rolls fresh for dinner and served them alongside steak, roasted potatoes, and vegetables. The next morning, we sliced the leftovers in half and used them as the base for biscuits and gravy. (You can find my gravy recipe linked here.) Just make sure to use a gluten-free flour blend for the gravy!
Make-Ahead and Freezer Friendly
These rolls are easy to double or triple and freeze in batches. Simply bake, cool completely, and store in a freezer-safe bag. On a busy night, pull them out, warm them in the oven, and enjoy fresh-baked rolls without the extra prep.
The Recipe
Yield: 8 rolls
Prep Time: 20 minutes (plus 1 hour rise)
Bake Time: 22–25 minutes
Ingredients
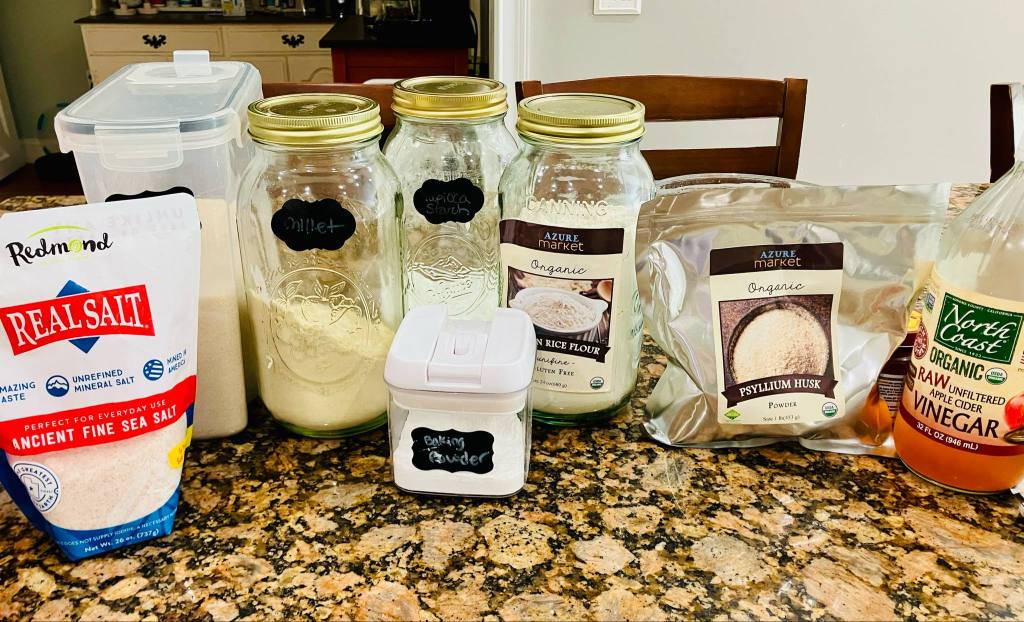
- 1 ¼ cups fresh milled millet flour
- ½ cup fresh milled brown rice flour
- ½ cup tapioca starch
- 2 tsp baking powder
- ¾ tsp fine sea salt
- 1 tbsp psyllium husk powder
- 1 ½ tsp instant yeast
- 1 cup warm water (110°F)
- 1 tbsp honey
- 1 egg (room temperature)
- 2 tbsp olive oil
- 1 tsp apple cider vinegar
- Butter or olive oil for brushing tops
Instructions
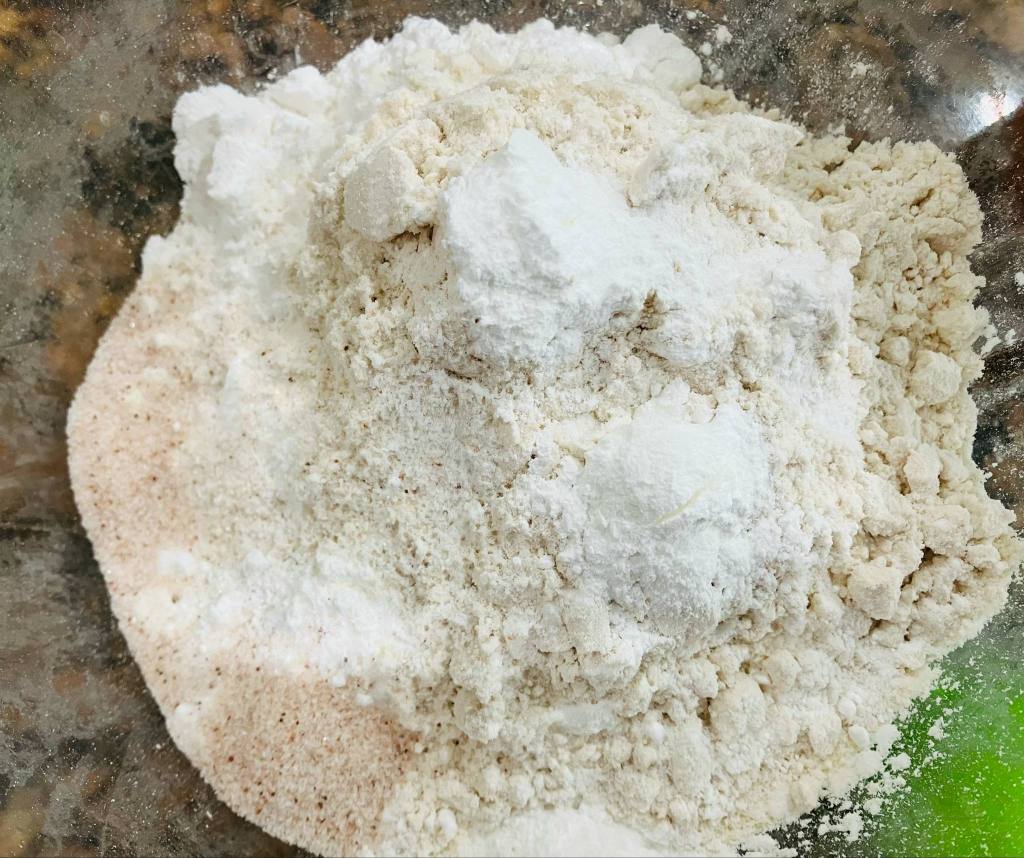
1. Mix Dry Ingredients
In a large bowl or the bowl of a stand mixer, whisk together dry ingredients except the psyllium husk powder and Instant yeast:
- Millet flour
- Tapioca starch
- Brown rice flour
- Baking powder
- Sea salt
2. Mix Wet Ingredients & Activate Psyllium
In a stand mixer, stir the psyllium husk powder and yeast into the warm water. Whisk for 1-2 minutes until it forms a gel. Whisk in the egg, olive oil, honey, and apple cider vinegar until well incorporated and creamy.
3. Combine & Mix
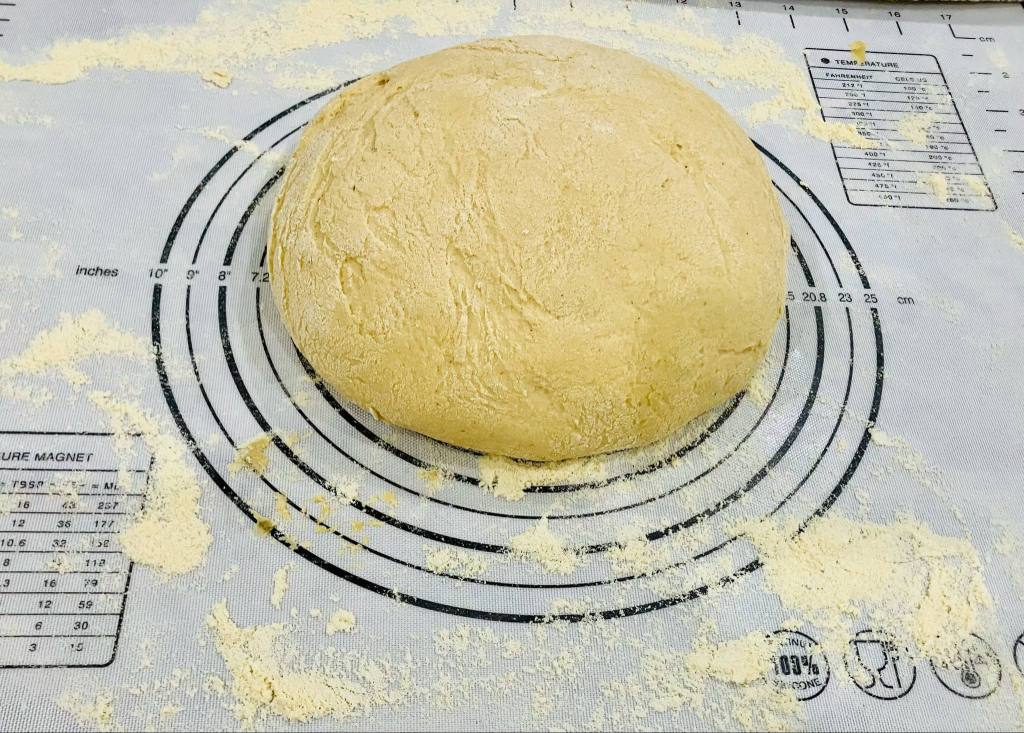
Switch to a dough hook on stand mixer. Pour the dry ingredients (about 1/4 cup at a time) into the wet mixture, until it’s all incorporated. Mix for 3–5 minutes in the stand mixer. The dough will be thick and sticky.
4. Let it Rest
Cover the bowl with a towel and let the dough rest in a warm place for 60 minutes.
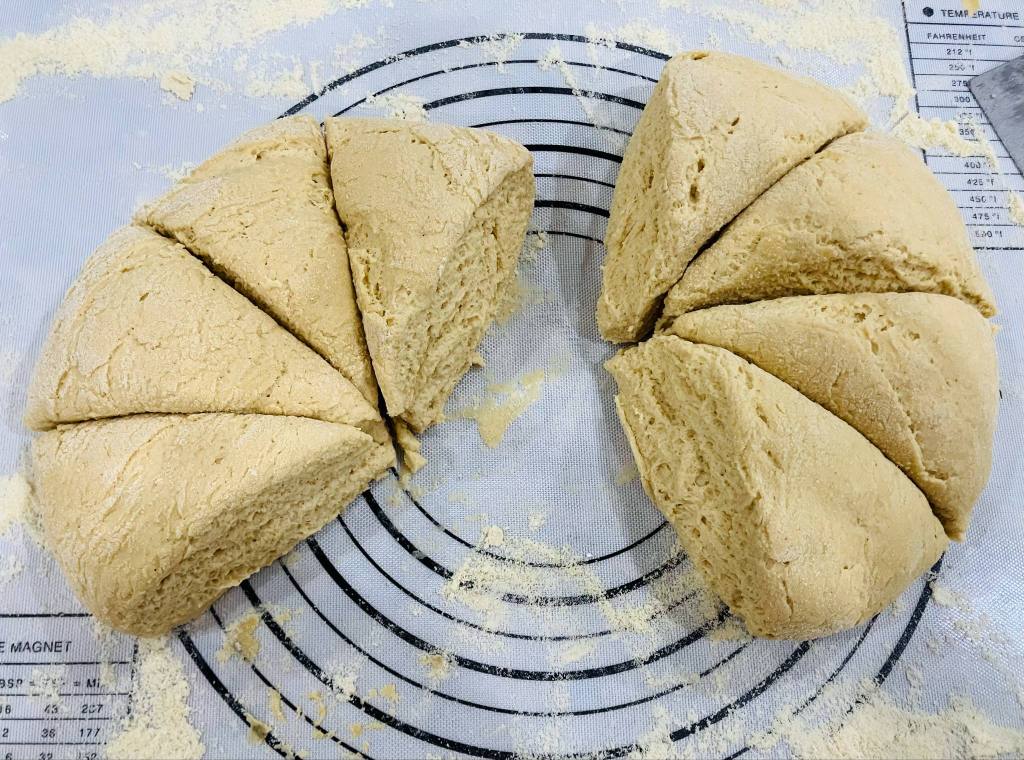
5. Shape the Rolls
Divide the dough into 8 equal portions. Shape each into a round ball.
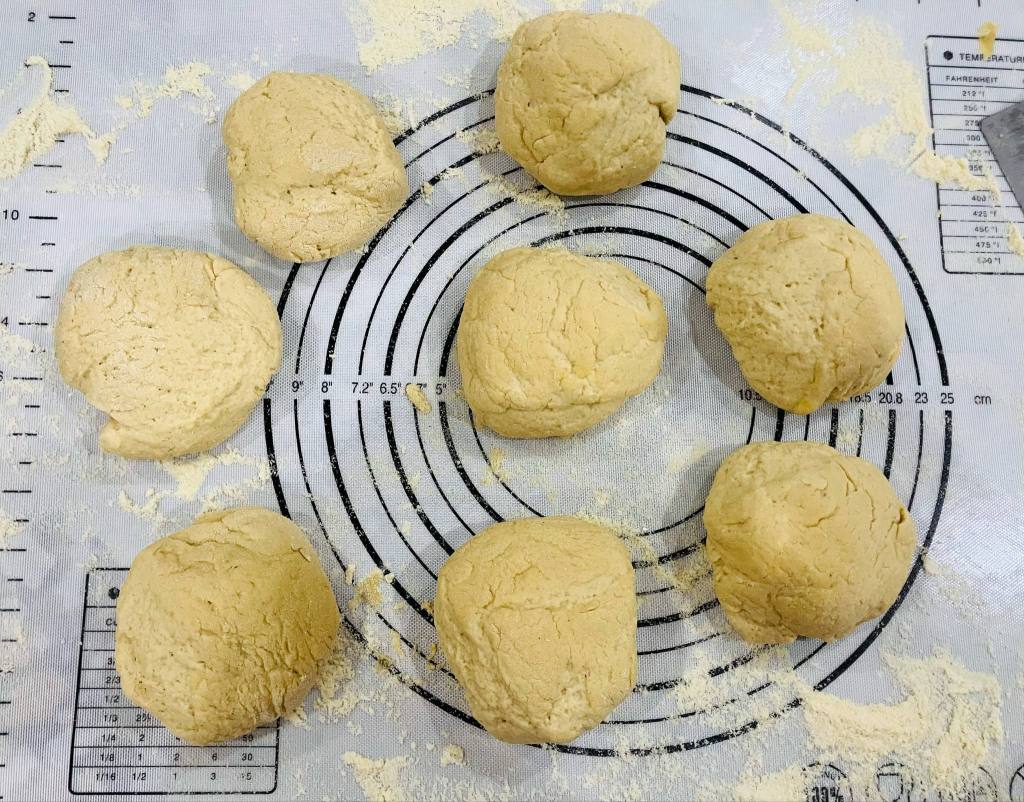
6. Second Rise (Optional)
Let the rolls rise for another 15–20 minutes while your oven preheats to 375°F (190°C).
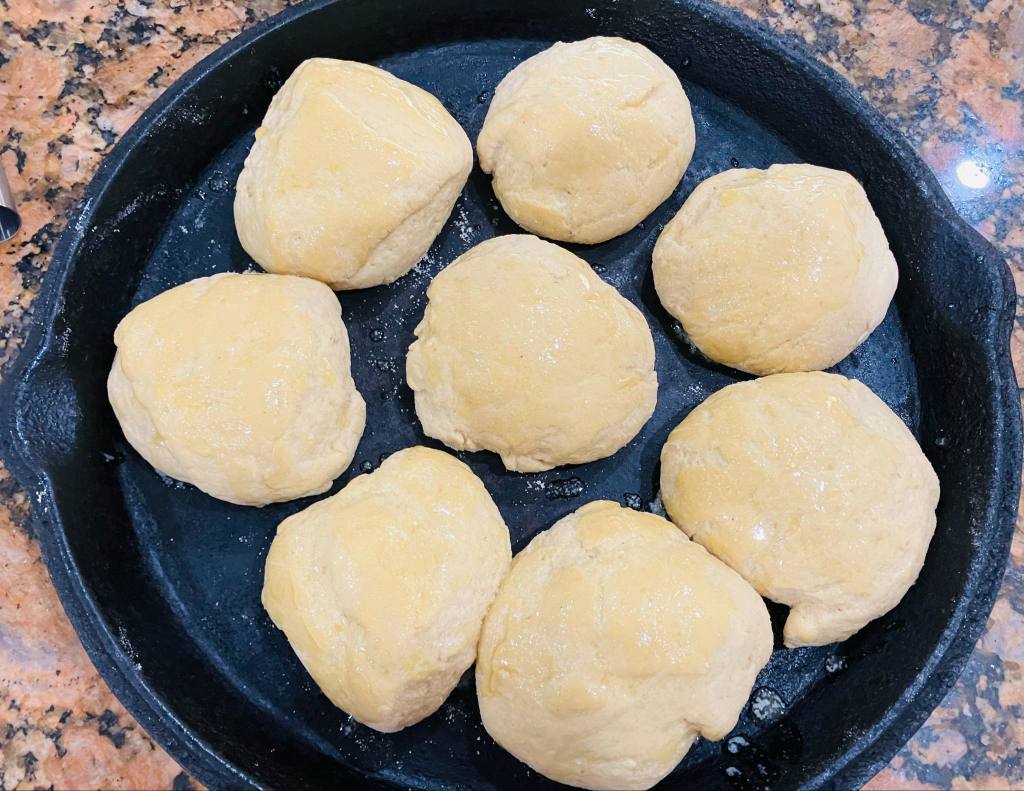
7. Bake
Bake for 22–25 minutes, or until the tops are golden and firm. The internal temperature should reach around 200°F.
8. Finish & Serve
Brush with melted butter or olive oil while still warm. Let cool slightly before serving.
If you’ve been missing a solid, trustworthy roll at dinner, give these a try—they’ve officially earned their place at our table, and that’s saying something.
Most of the ingredients I used were sourced from Azure Standard, a company I trust for high-quality, bulk pantry staples. I highly recommend checking them out if you’re looking to stock up on fresh, clean ingredients.
And if you’re diving into the world of fresh-milled, gluten-free baking and want community support, recipe inspiration, or a place to ask questions, I’d love for you to join our new Facebook group:
Fresh Milled Flour | Gluten Free Grains.

Affiliate Disclosure
This post contains affiliate links. I may earn a small commission from qualifying purchases. This is at no extra cost to you and helps support the work of Vintage Virtues. Thank you! See full Affiliate Disclosure here.

Leave a comment