
(Updated 05.31.24)
What is Kombucha, anyways? It’s a fermented tea with origins dating back to the B.C. period. According to a Cleveland Clinic health article, consuming Kombucha offers health benefits such as boosting gut-friendly probiotics, weight loss, decreasing inflammation, strengthening the immune system, fighting cancer, aiding in detoxification, and promoting heart health.
I have tried various flavors of Kombucha, but I’m not a fan. I have a hard time getting past the distinct pickled flavor. However, there is a different product I do enjoy – KeVita Sparkling Probiotic Refresher in the strawberry acai flavor. It is fermented with a water kefir culture and has a milder flavor. But I digress – my husband and son are big fans of Kombucha and enjoy it immensely. So much so, that my husband decided to brew up his own after his friend gifted him his first SCOBY starter. We’re now 9 months deep into the Kombucha brewing process and making scoby babies! Glass jars have become a more permanent counter-top fixture.
How to Make Homemade Kombucha
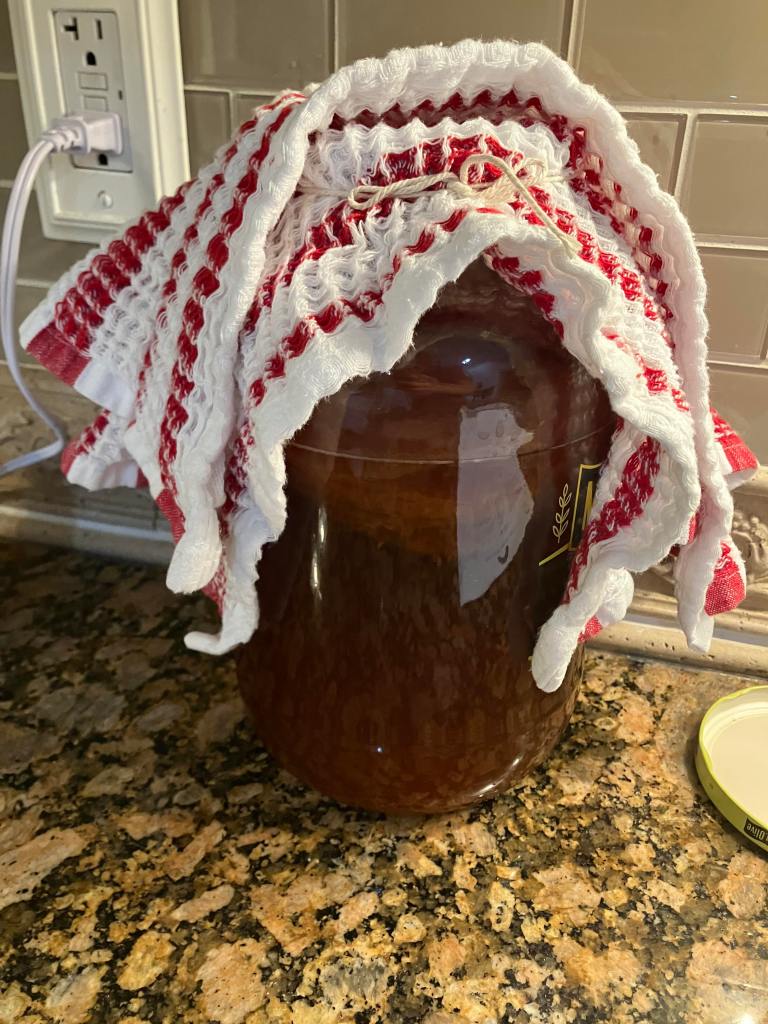
Like sour-dough bread and other fermented products, a “starter” is required. Kombucha starter is referred to as a SCOBY, defined as “a cellulose mat that houses the bacteria and yeast cultures that turn sweet tea into kombucha” Start with a new scoby, either from someone who’s already brewing, or you can purchase an Organic Kombucha Starter and Swing Top Glass Bottles – Flip Top for 2nd Fermentation online. The right kind of bottles, with pop tops are essential. You’ll want to make sure to use a good quality bottle, that’s BPA free, as well as glass for storing.


First Fermentation Process (Makes half a 1/2 Gallon)
Ingredients:
- 2 tea bags
- ½ cup of white sugar (alternative sugars, including raw will affect the results)
- 2 cups of water
- Boil water. Pour water over two tea bags, add half a cup of sugar, and let it cool overnight. That’ll stay there till the morning to cool on the counter. Then pour strong brewed tea in, add-fill with water up to the shoulders of the jar, and that’s it for a few days until the batch is ready. Make sure to stir every couple of days.
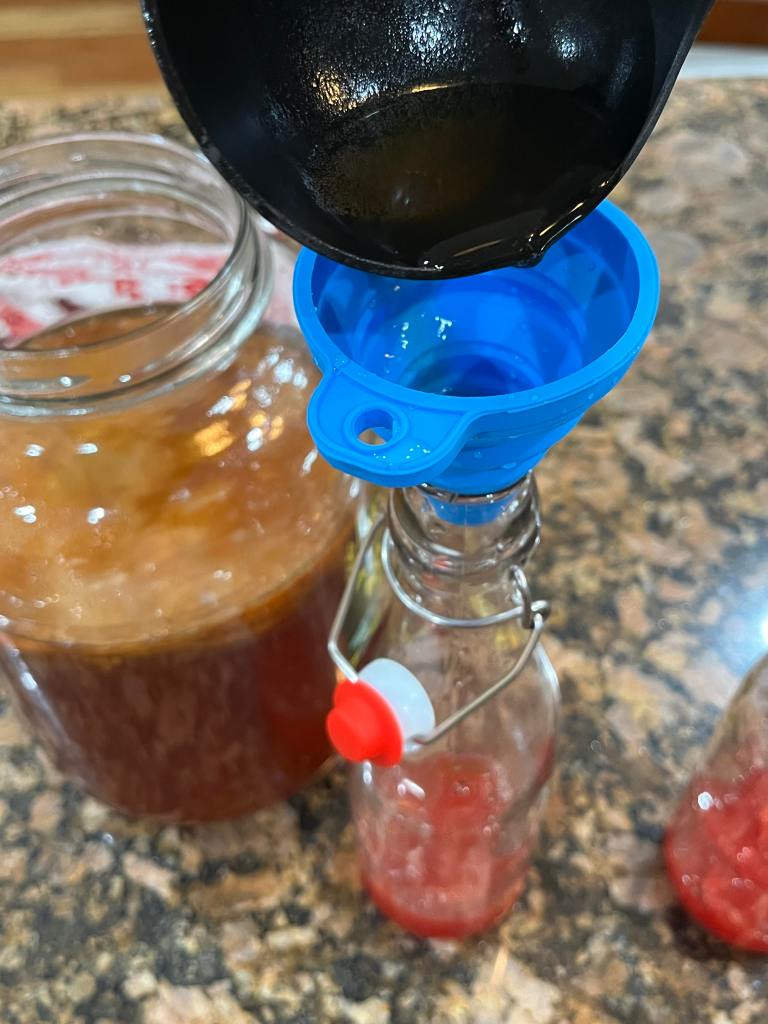
Second Fermentation
Remove two cups of Fermentation 1 (starter tea for the next batch). Stir the remaining liquid. Use approximately—¼ cup (2oz) of fruit puree per 16oz bottle. Dry tops of bottles after filling. Make sure the lids are super tight. Let bottles sit at room temperature for two-three days with no burping. It gets really carbonated after three days. Move to the fridge, do not open until completely cooled. *Note- You can use fruit puree or juice to create different flavors. If using fruit puree or juiced puree, it is harder to clean the bottles after use.
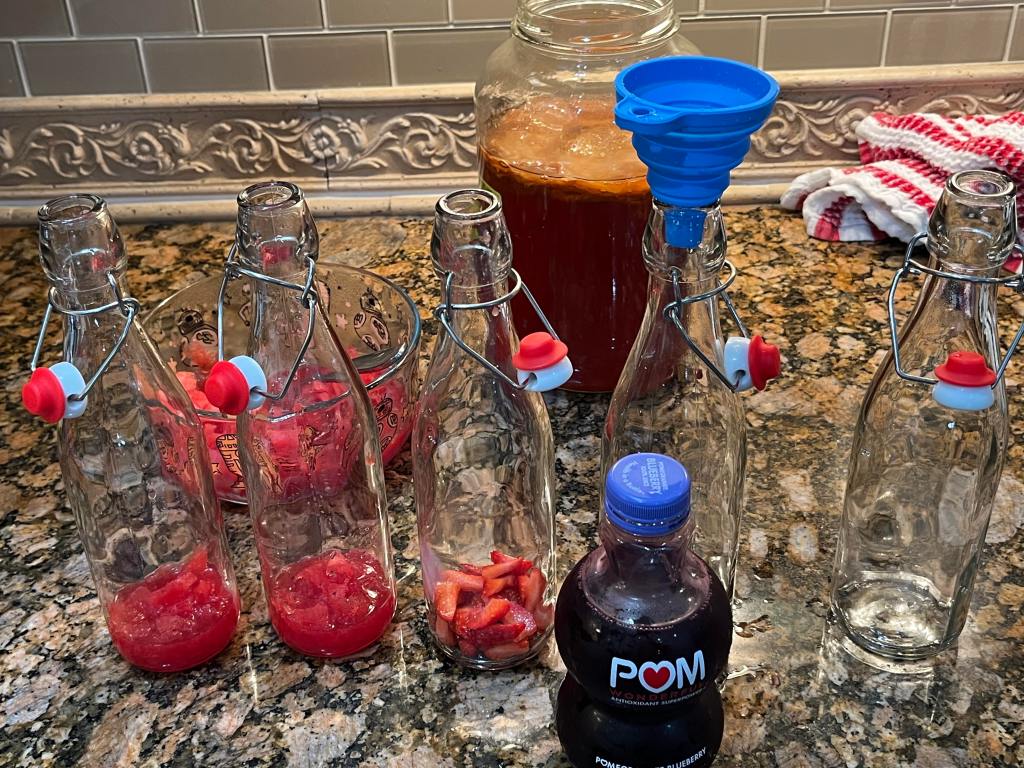
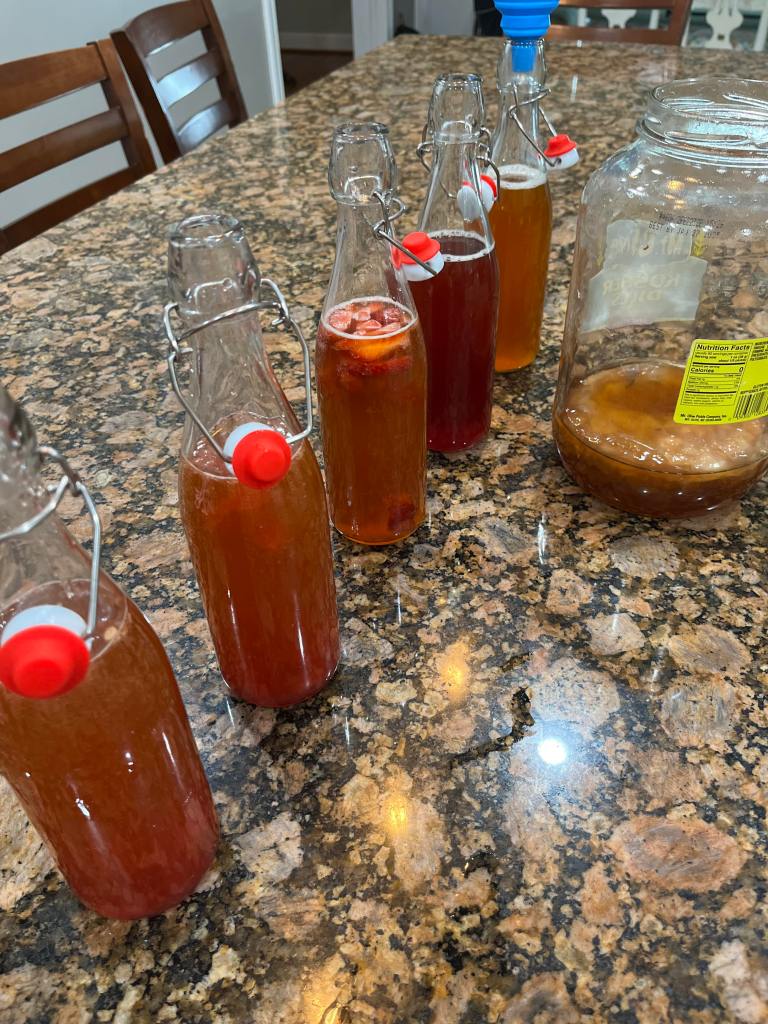
By following the instructions above and adding 2 ounces of fruit puree to each 16-ounce bottle, my husband made 2 watermelon, 1 strawberry, 1 blueberry pomegranate, and 1 plain, for a total of 5 bottles of Kombucha.
Now, if you’re looking for an all-in-one, comprehensive DIY Kit, be sure to check out Farmhouse Teas. You can also get a great Kombucha flavor combination such as Cherry Almond or Strawberry Mojito!

I may earn a small commission for products linked on this page. Your purchase from these links helps offset the cost of this blog and cost you nothing extra. Thank you for your support and Happy Brewing! For more information, visit our affiliate disclosure page.

Leave a comment